April 2012
Wireless Control for the Winter Valley
It was a long time coming and it will be a while before it’s all done but eventually all 9 of my diesel engines will be equipped with ‘radio control” by AirWire and controlled by the new T5000 wireless throttles.
Wireless thinking started a few years back with the introduction of a large-scale Digitrax system. No point in going over my feelings about Digitrax but Locolink had a tried and true product demonstrated at the Chilliwack Train Show in 2009. They weren’t real cheap but they were readily available, used, on line, so I started to buy them up and try them out. Well, all those parts are under the workbench again waiting for me to put them back on eBay. The technology seemed older, although smarter, than Digitrax. Still, I didn’t like that either.
The Aristocraft TrainEngineer had the cell phone technology I didn’t want. The NCE ProCab looked and worked great. I’d seen it in action with HO scale and the QSI decoder was also darn good. Plus it came with sound at a cost advantage. There was something wrong with the throttle though. For me anyway. Maybe just too darn big.
Click on photo for enlargement
In the end I chose to go with, in my opinion, “expensive, but with many technical plusses.” AirWire is a reliable name in the hobby (CVP Products) and it was chosen by the manufacturer of all my engines (USAT) to be their partner, as it were, in the wireless sound marketplace. There’s something to be said for that. The drop-in feature appealed to me as well although as it turned out, that’s a bit of a misnomer. Yes, I have an electronics background but this is a hobby – not a vocation. Phoenix sound is expensive, rather too expensive in today’s world, but they do set a standard in locomotive sound, in any scale, and their customer service is truly outstanding. We’ll get to the cost of my decision later.
The drop-in receiver/decoders for my F7A/B engines were ordered directly from CVP Products. They were really excellent people on the phone offering advice and taking a huge amount of interest in what I was trying to accomplish using a track power bridge. I also ordered my second T5000 throttle so I would eventually be able to have an honest operating session down here. The people at Phoenix were great as well and even said they would send a second speaker, and special cable, for the B unit rather than having me buy a second sound card. Nice eh?
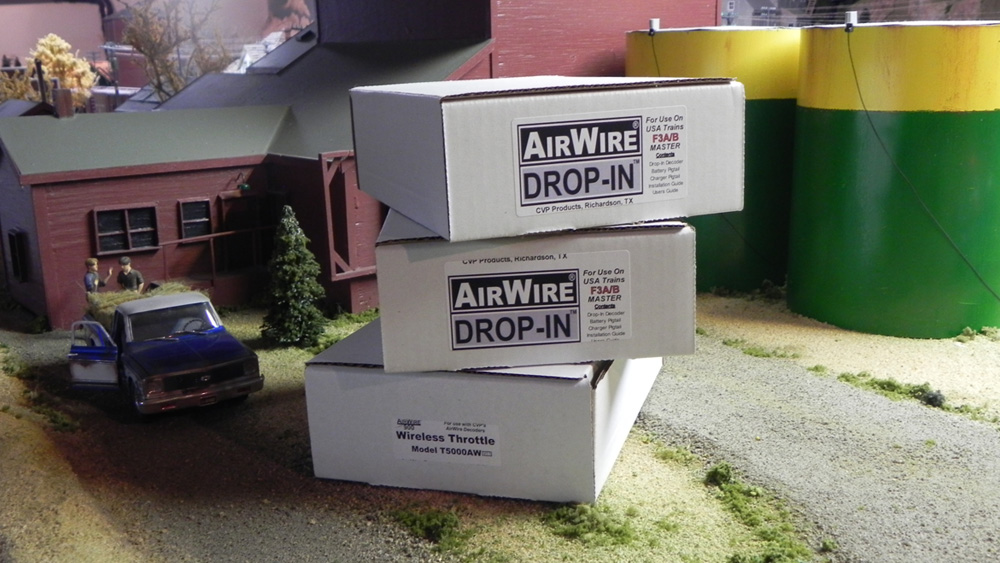
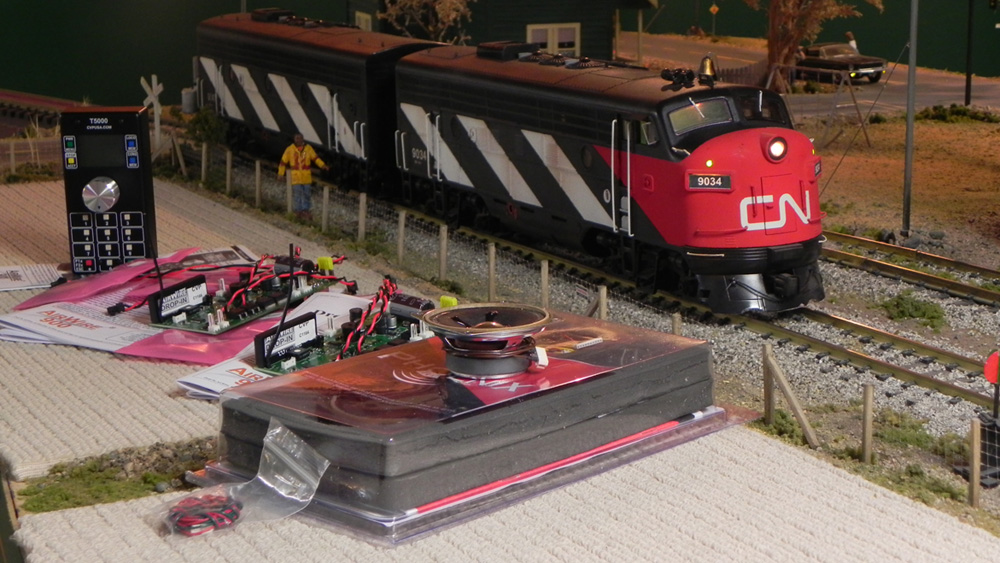
So what do I have to get started? I have my USA Trains F3A/B reworked as my CN F7A/B set and running, as intended, on track power. I have a T5000 throttle (shown below) that I really like and if you’ve used Digitrax throttles you’ll simply LOVE this one. It’s much easier to navigate. I also have two drop-in cct boards that directly replace the motherboards in the A and B engines; the battery charging pigtails that I won’t use, and the appropriate lighting cables. There are also various operating manuals that are NOT written for this throttle (or written by anyone with even a modicum of tech writing skills) as well as rather good installation instructions. Keep in mind that I will not be installing the battery installation. More on that as we go along. Pictured below is also the Phoenix package and the extra speaker and cables.
Click on photo for enlargement
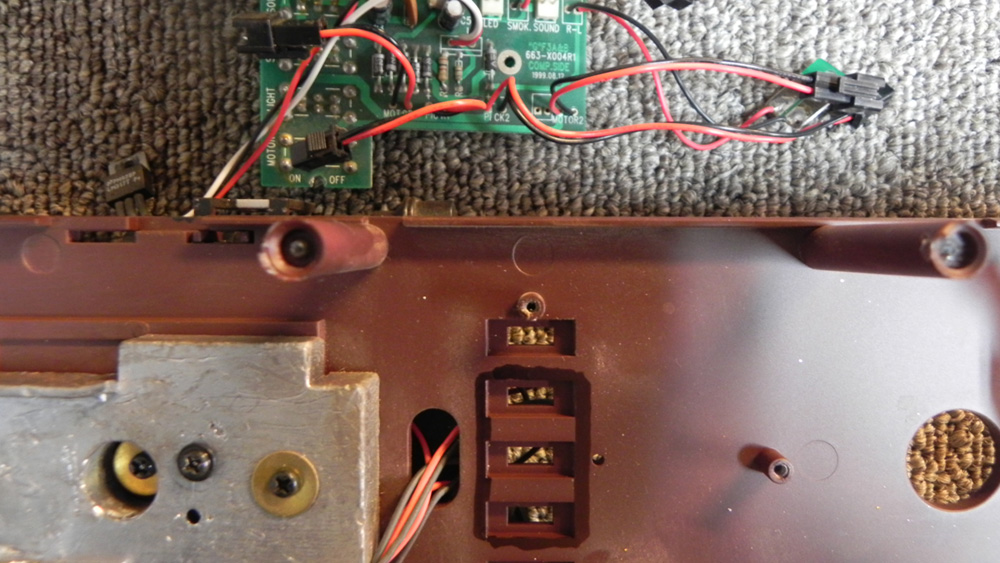
Both shells were removed with little trouble. The dirt and dust that had accumulated inside following 6 years of indoor running was quite a surprise. Gasp! I won’t go further into that topic. As you can see, the smaller, smoke controller boards are the same in both engines but the main board in the A unit is more complex. This is due to the extra lighting required.

Click on photo for enlargement
I followed the instructions in the guide on pages 9 and 10 and everything seemed to go well. I did not remove the front truck prior to enlarging (cutting) the hole to accommodate the drop-in board but I can see why it might be a good idea if you’re not the type to be careful with a knife. The wires to/from the front truck are very close at hand.
Click on photo for enlargement
The speaker and computer interface jack were mounted in the fuel tank just as suggested. Be careful here. The text suggests that the programming plug should face the back but the photo in the Instruction sheet can be deceiving. Check yours. Phoenix had sent me the extra speaker for my B unit so I mounted that one as well but without the interface of course. Back in the shells I disconnected the rear light and smoke unit connections as suggested and tossed away the spring connections. We’ll see how that works down the road. Checking the front-end wiring is probably a good idea. An issue they don’t address is being sure the tape used to hold down the loose wires doesn’t interfere with the number board lights.
Issue: I didn’t have what they kept referring to as the “speaker header” provided by USA Trains. Perhaps they didn’t fit this during production run but for whatever reason, it wasn’t there. Anyway, I have no idea what it is and so clueless, I move on.
Installing the bridge rectifier power system.
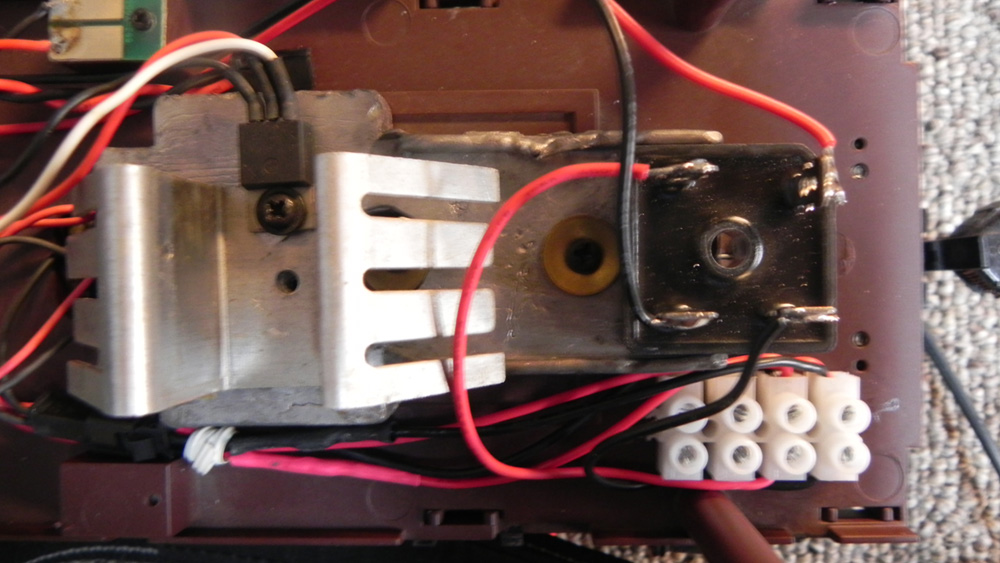
I’m not going to mount the 14.8 Volt Lithium batteries so here we go. The USA Trains boards are very sensitive to incorrect polarity. They were after all, made for reliable +/- battery operation. If a person were to directly connect track power to the drop-in boards they MAY work in one direction but when the operator reversed his or her train those new and expensive boards would be fried. There is no warranty here. My track power will be fixed at 16VDC to account for the small loss through a single GBPC 3506 bridge rectifier. That track power will be connected to the AC input of the bridge and +/- output will be connected to the battery connection of the drop-in receiver. As a result, the output of the bridge will ALWAYS be the desired polarity and very near 15 volts.
The new Drop-in board has only 4 connecting cables; rear motor, front motor, battery (red = +) and smoke. That of course leaves out the old slider/wheel pick-ups that are no longer used with batteries installed. I need them though and I connect them through a small terminal board to the AC input of the bridge. The terminal board isn’t real necessary but I like it.
Obviously care must be used to identify the polarity of those the pick-ups and the wheels in order to connect them together properly. Red and black leads are reversed on one truck as usual. So for this job I’m going to need 2 rectifiers (A and B units) and two small terminal strips.
Note: All Electronics at www.allelectronics.com has the same red/black 2 connector locking plugs used by USA Trains. I bought 50 a while ago and have used them for everything. See Catalog # CON-240. You’ll find a few will come in real handy in this job.
Click on photo for enlargement
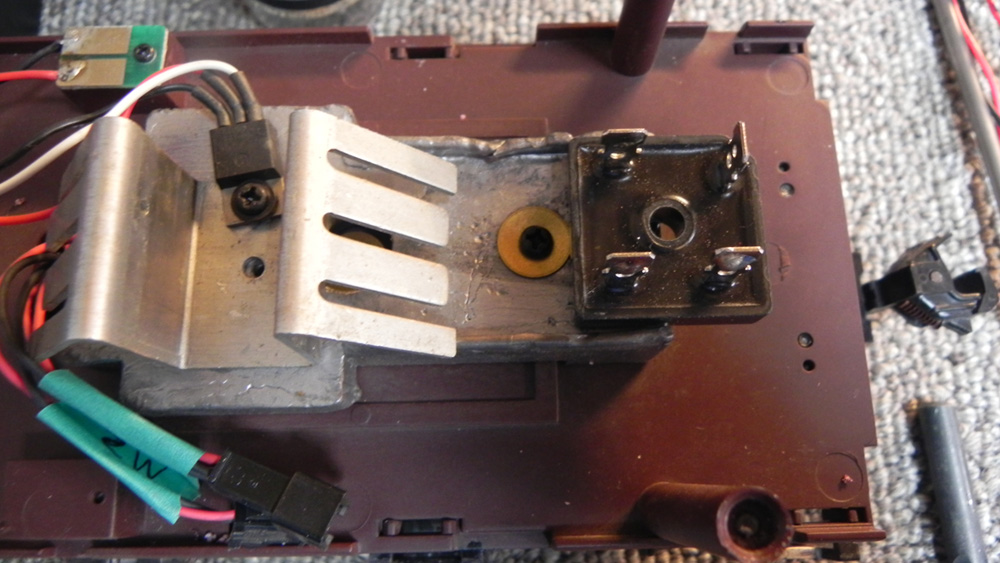
The bridge rectifier is mounted on the rear heat sync with crazy glue. That will keep it locked down tight while you solder wires to it. It will stick over the end about ½ inch. Identify the right and left side wires for both the front and rear trucks and fix them to a short terminal board. See photo. The wires from the front truck won’t reach. This is were those CON-240 connectors come in. Run a pair for wires up from the terminal board to the ~ input of the bridge. Note that reversing the polarity of the PS (reversing the engine) will not change the polarity of the DC voltage out of the bridge rectifier. Now you’ll be ready to connect the Battery input on the Drop-in board but you may have to extend those wires about 4 inches. More CON-240’s
Click on photo for enlargement
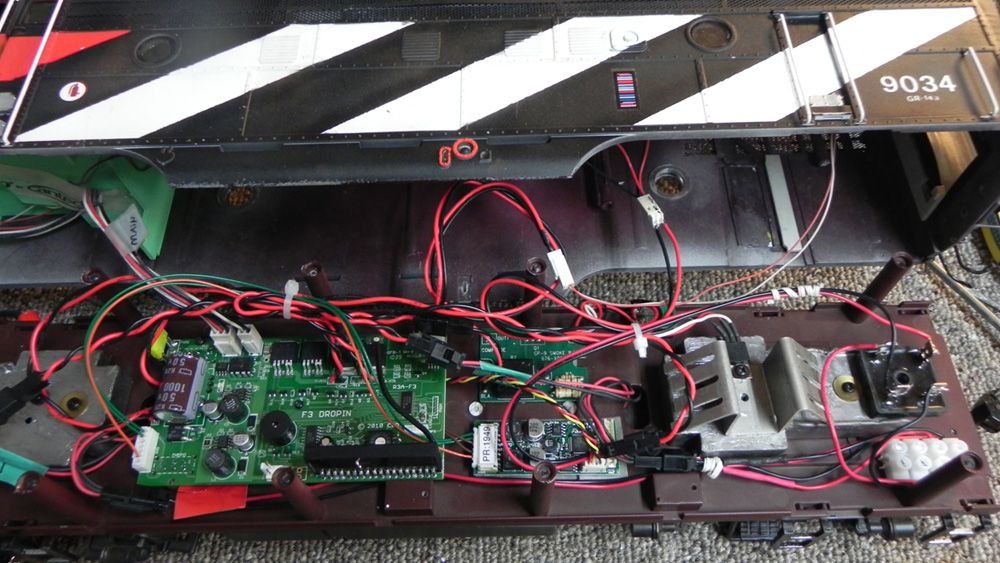
Power’s ready. Now I’ll put some sound in here. Move the smoke controller board as per the instructions. Remove screws, move, cut off the posts on the frame and use two-sided tape to set it to one side leaving room for the small soundboard beside it.
\
I installed the Phoenix board just as suggested and then screwed in the Drop-in board. I connected all of the interface cables leaving off the battery connection for now. The rear light connector jumper was installed and now I was up against that missing smoke unit connection again.
The ‘fix’ was using another All Electronics cable, Catalog # 242. The one I had was the same as the one leading from the smoke units in the shell but mine came with the male component. Carefully soldering a black/red pair onto the bare pins and then using shrink wrap I managed to connect the two generators to the smoke unit through the raised pads.
I tied up the loose cables, rechecked the PS input at 16 Volts at the terminal board or about 15VDC at the output of the rectifier and plugged it in to the Drop-in (Battery) connection. Just what the doctor ordered so I turned it on.
Click on photo for enlargement
The sound card comes on with power supplied at the switch under the locomotive. A bit of start up sounds and then idol. The Drop-in board comes up (red and green lights) when the other power switch is moved forward. All drop-ins are programmed 03 out of the factory so using the new T5000 I selected Menu, Menu, 4, Entered CV1, # 9034 (my loco number) and # again. The board ‘chirped’ and my F7A 9034 was in the throttle. Lights, horn, bell, revs, chatter were all there. Good.
Moving on to the B unit…..
Now as promised, just a quick glance at some of the prices I encountered. Check this sum against the cost of two F units from USA Trains – or any other maker. Ouch!
| 1 | One T5000 throttle |
$159.00
|
| 2 | Two Drop-in F3A/B receivers |
$278.00
|
| 3 | One Phoenix sound card |
$190.00
|
| 4 | One speaker |
$12.75
|
| 5 | Two full wave bridges |
$13.70
|
| 6 | Two small terminal boards |
$ 4.78
|
| 7 | Four 2 wire connectors |
$10.00
|
| 8 | Shipping and handling |
$64.68
|
| Total | $732.91 |
So there. I am absolutely thrilled with the AirWire operating system and the Phoenix sound card. Note that the FA and FB will be effectively always coupled so I programmed the B Drop-in with the same number, 9034, as the A unit and they both work beautifully together without any tweaking. That’s also one less engine that has to be stored in the T5000 list. My SD70 is already there.
I’m recommending this system but of course but you have to check for yourself. Be sure to see: http://www.cvpusa.com/airwire_dropins.php You can also check out the T5000 on the same page.
I hope this is of some help to Large Scale fans out there. My regular photo/story continues next month when I have to help Loree’ move into a new place. If I can.
See you all at www.mylargescale.com